Right the First Time
I designed and developed this scenario-based eLearning concept project to help analysts and scientists at a contract research organization (CRO) reduce deviations from the method when conducting assays.
Throughout the course, the learner engages in a series of real-life, low-risk scenarios. They learn which actions can reduce deviations and which actions may increase the likelihood of deviations.

- Audience: Analysts and scientists
- Responsibilities: Instructional Design, eLearning Development, Graphic Design, Visual Design, Storyboarding, Needs Analysis / Action Mapping, Prototyping
- Tools Used: Articulate Storyline 360, Vyond, Adobe Illustrator, Adobe XD, Adobe Photoshop, Mindmeister, Google Suite
The Problem
Shenry Biosciences (a fictitious client for this concept project) noticed a high rate of method deviations during assay-based sample analysis for a large client. Deviations were costing Shenry money as failed plates need to be re-run at least once. Shenry’s client expressed their concern regarding the effects of frequent deviations on their project (e.g. extended length due to re-running samples and writing deviation reports). Shenry Biosciences reached out for help reducing deviations.
The Solution
After careful analysis of the performance problem, I confirmed that Shenry’s analysts and scientists lacked the knowledge required to reduce deviations. To solve the performance problem, I proposed a scenario-based eLearning experience where the analysts and scientists could practice the critical portions of a sample analysis assay in a low-stakes environment.
The client accepted my proposal and we proceeded with the project.
Process
Using the ADDIE model, I iterated on each step of the process until I was happy with the look, feel, and content of the learning experience. This process included creating an action map, drafting a text-based storyboard, designing visual mockups, and building an interactive prototype.
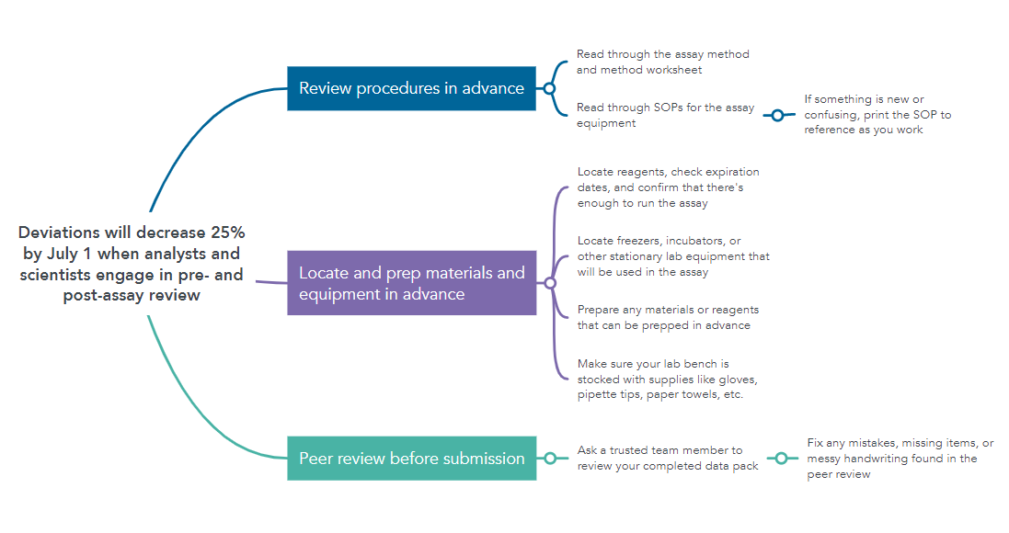
Action Mapping
Once the client accepted my proposal, I consulted an experienced scientist as my subject matter expert (SME) to develop the action map and establish the overall goal for the project. Guided by Cathy Moore’s strategic action mapping process, I conducted a kickoff meeting with the SME. We decided to measure progress by using deviation data the company was already collecting. Next, we brainstormed actions (observable tasks) that scientists and analysts would need to engage in in order to decrease the occurrence of deviations during sample analysis. I analyzed these actions and narrowed down the three most critical actions for reducing deviations.
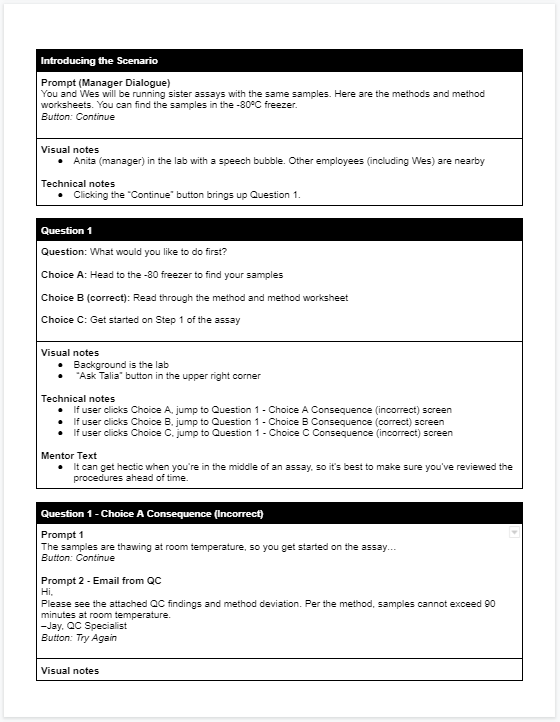
Text-Based Storyboard
Once the action map was completed and approved by the SME and client, I began working on a text-based storyboard that incorporated the three main actions into a narrative. I framed the scenario as an analyst or scientist conducting an assay at Shenry Biosciences. I consulted with the SME to ensure each element of the scenario would feel real to the learners.
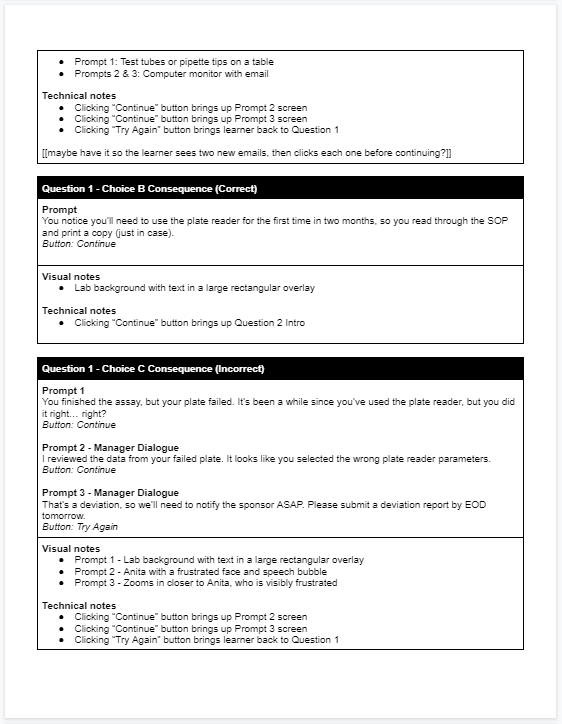
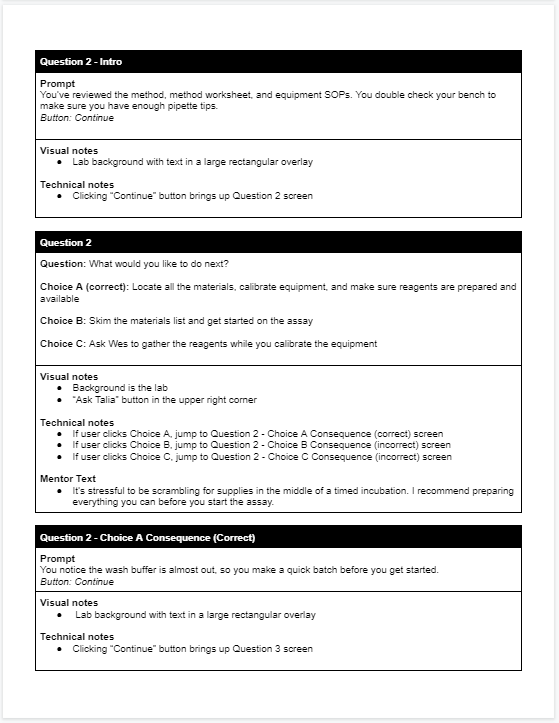
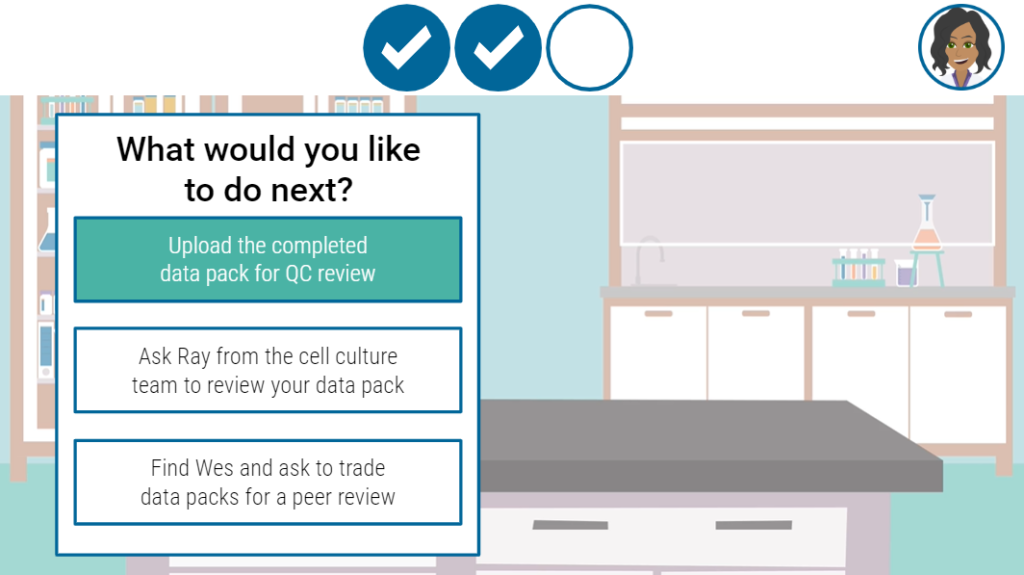
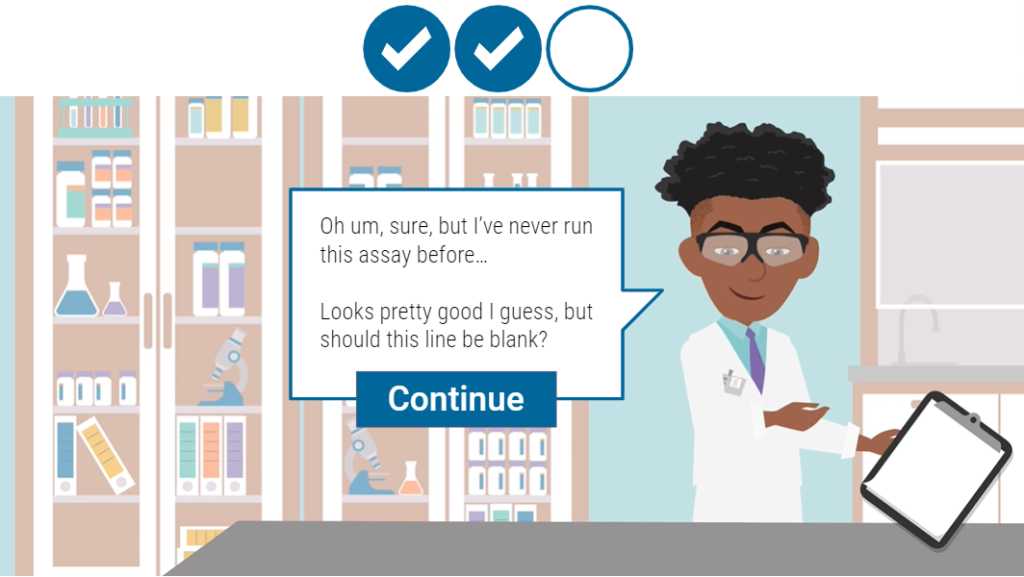
I chose an assay that is similar to another scientist’s assay, so the user would be tempted to lean on the other scientist for assistance with assay prep and reagents. Question prompts occur at critical times in the assay (before, at the beginning, and at the end). Questions include correct answer choices as well as realistic distractors and common mistakes. I incorporated a mentor to provide assistance and simulate the guidance of higher level scientists within the Shenry organization.
I wanted to make sure the learner received feedback on their selected choices. Correct answers allowed the learner to continue with their assay. For incorrect choices, the learner watched the consequence scenario, learned from it, and tried again. Consequences were true-to-life, including receiving feedback from management or emails from the quality control (QC) team.
When I was confident that my storyboard laid out an engaging, learner-centered experience, I sent it to the client for review.
Visual Mockups
Once the scenario storyboard was revised and approved, I began creating and iterating upon visual elements. I created a style sheet to ensure I was keeping colors and fonts consistent with Shenry Biosciences branding.
My main objective was to include visuals that contributed to the story and made the scenario feel more realistic. I used Adobe Illustrator and a combination of DIY and premade assets from an online image repository in order to create the laboratory setting for the scenario. I consulted the SME and looked at pictures of biotech laboratories in order to ensure that the laboratory would look and feel realistic to the learners.
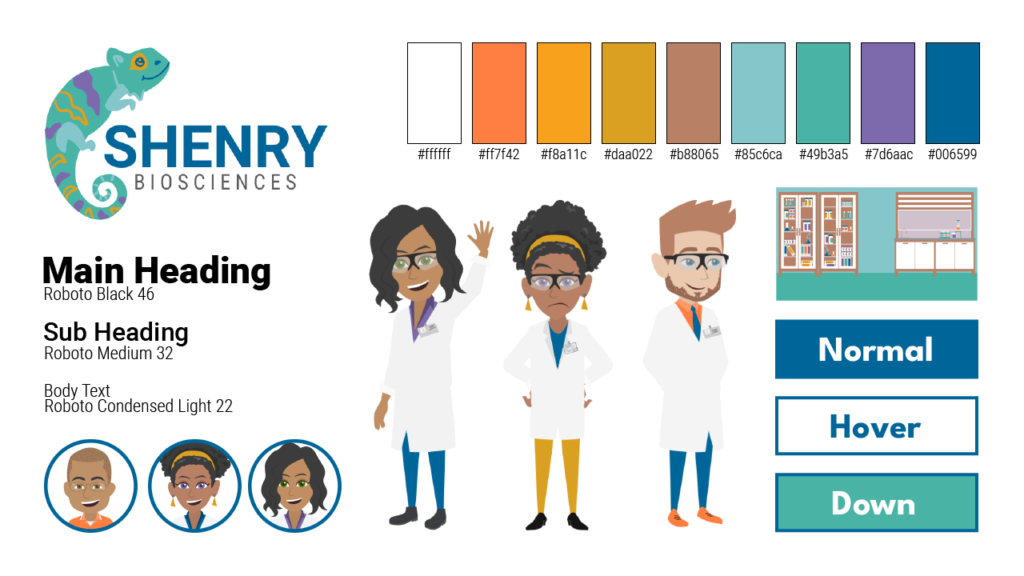
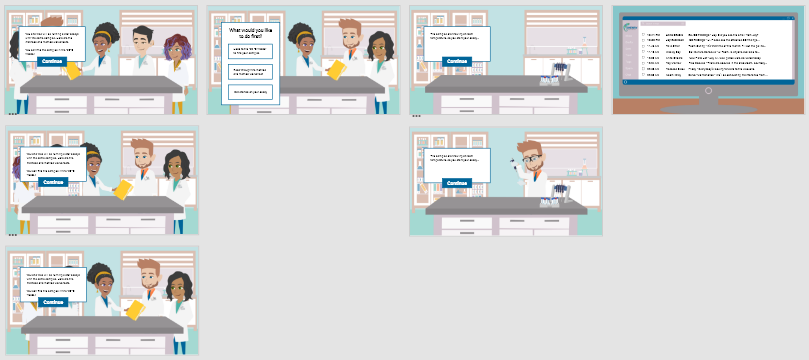
After completing the style sheet in Illustrator and the characters in Vyond, I begin to create visual mockups in Adobe XD. Adobe XD allowed me to experiment with visual elements and layouts for the introduction and first question in the learning experience. I iterated upon each screen until all visual and instructional information had a logical flow that would make sense for the learner.
Interactive Prototypes
I used Articulate Storyline 360 to create an interactive prototype that combined the visual mockups, text-based storyboard, and Vyond video clips. The interactive prototype established the scenario’s programming and transitions for the introduction and first question. I utilized triggers, variables, animation, sound, and videos. Once satisfied with my work, I shared it with the client’s SME as well as my mentors and peers in the learning and development community. I iterated based on feedback collected during the reviews.
The feedback was mostly positive, but one reviewer suggested adding a progress tracker that gave users more obvious feedback on their correct answer choices. Using a mix of sound effects and visual design, I added a checklist along the top bar. Correct answers checked off the steps to reducing deviations and the learner could see their progress throughout the learning experience.
Once the review process was completed and the interactive prototype was approved by the client, I began full development of the project.
Full Development
During full development of the scenario in Articulate Storyline 360, I iterated upon the remainder of the project until I was happy with the flow of the animations, sounds, visuals, and triggers utilized in the scenario. Since the visual elements and programming framework were established, full development moved relatively quickly.
Features
- Custom Visuals: I created visuals like the lab background by editing assets acquired from an image repository and combining them with assets I created in Adobe Illustrator (like the fume hood). Asset editing included resizing, recoloring individual elements, editing layers, and merging assets.
- Custom Animations: I created and iterated upon the scenario video clips in Vyond. Animations for the text boxes, speech bubbles, and checklist icons were added using Storyline 360.
- Prescriptive Feedback – Mentor: For each question in the eLearning, learners can access their mentor Talia by clicking the “Ask Talia” button. Talia doesn’t provide the learner with the answer, but she does provide guidance to help the learner make the correct choice.
- Immersive Scenario-Based Scenes: Each answer choice allows the learner to experience an immersive, real-life scenario. For example, one deviation results in an email from a QC specialist, similar to one a scientist would receive while working at Shenry.
Results and Takeaways
After completing the project, I shared it with my SME and learning and development network. The feedback was overwhelmingly positive. Viewers noted that they loved the checkmarks and thought the scenarios were clear. One said, “I’m not a scientist, but I can understand it.” The scientist I consulted thought this experience would be helpful for training new analysts and scientists.
I learned a lot about the instructional design process while working on this project. I had the opportunity to work with a SME, collaborate with peers, integrate feedback, and use new tools like Vyond. My key takeaways were:
- Iterate, Iterate, Iterate! Although the first prototype was well received, this project would not be what it is today without the implementation of feedback from my SME, mentor, or peers. Reviewing feedback and choosing which items to add, remove, or update helped me focus on the learner’s needs.
- Get Comfortable Being Uncomfortable: While creating this project, there were many times when I had to ask the SME to re-explain something scientific or when I had to write out my Storyline variable/trigger flow on a piece of paper. It was during these uncomfortable moments when I learned the most. I broke things down, jotted down possible solutions, and engaged in troubleshooting.
- Always Consider the Learner: At every step in the design process, I considered what would be best for the learner. I wanted the scenario to be realistic, but also straightforward. It’s easy to get caught up with elements that look or feel “cool,” but don’t add to the learner’s experience. I tried to ask myself, “How will this improve the learner’s experience?” before each addition or change.
With more time and resources, I would love to take this concept project to the next level by adding:
- xAPI functionality to track users’ answers and time to complete the scenario
- Additional sound effects to further immerse users in the scenario
- Additional scenarios for the user, in order to give them more practice and increase replayability